So my videos have been very supra-tic this week, Monday I couldn't upload my video. Tuesday was VERY busy PLUS I got saved **SOO happy :)** then today, we had to go sit with my cousin Earl because his dad (Harold) had a day surgery..Then tonight we had revival! But I promise next week will be really fun!
Anyway-- My Designer Britten has made a SUPER cool card!
Pattern paper is Paper Layerz by Megan Elizabeth. All ink is Ink Edgerz - Limelight and 1am (also by Megan Elizabeth). Cuts are from Happy Hauntings Cricut cart. Brads from my stash. That the sentiment is from Close to My Heart...background stamp from Tanner Bell Designs:)More info about this card will be posted on my blog on Wednesday. TwoAtATimeDesign.com
Happy Friday, Today I am sharing with you a really simple Everyday frame that you can make probably under $5 this Cheap and fun Craft is REALLY simple so I would recommend this for any crafter.
Hope you are all doing well and having a uplifting and crafty week! Today we have a very amazing, sweet, talented, and creative guest, Holly!! She has created some really fabulous projects to share with you today!
Here is Holly:
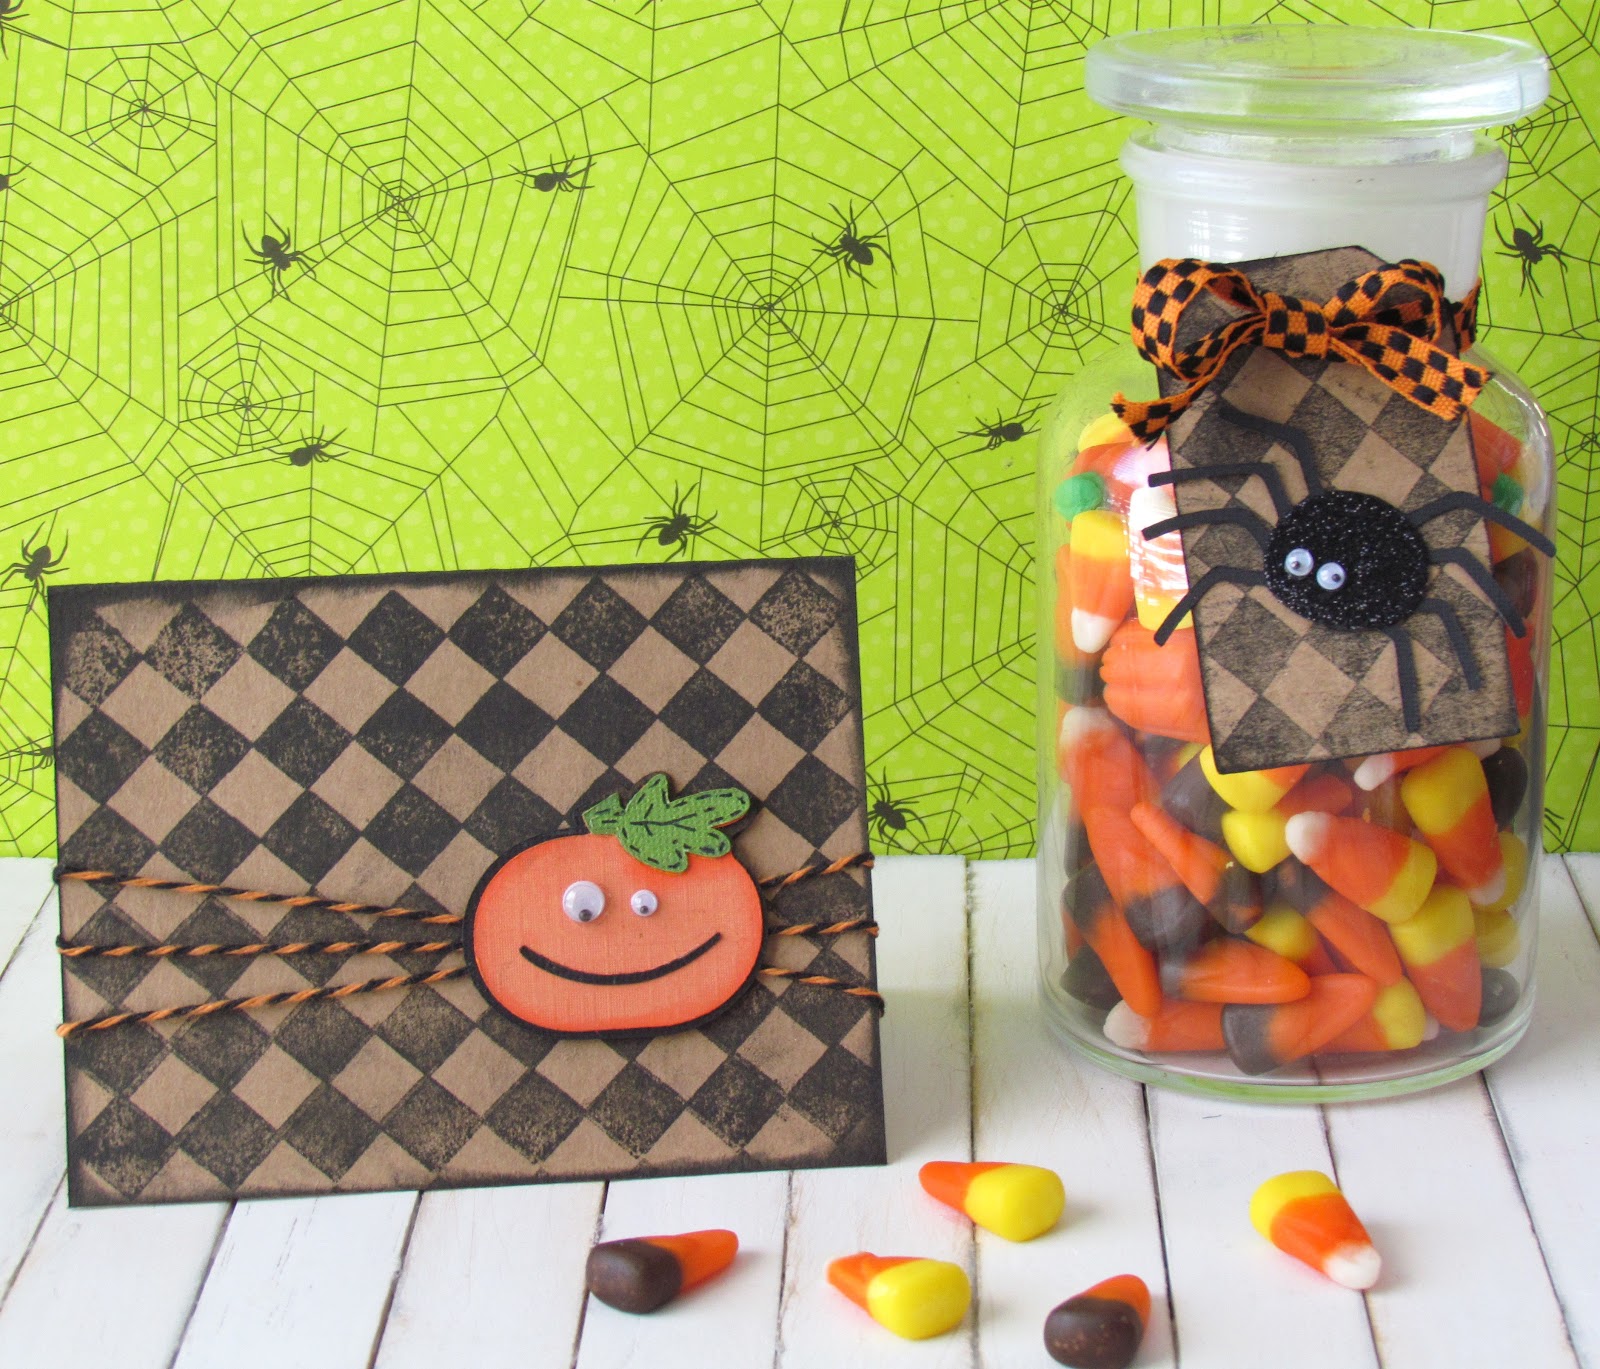
Holly here from Ribbons & Glue as Tanner's Guest Designer today sharing a few projects that I made using his new background stamp set.
I used Tanner's new Diamond background stamp to make a Halloween card and a tag to complete my Apothecary candy jar which BTW, just happens to be full of my favorite candy corn Harvest Mix- Yum!
For my card, I used the diamond background to stamp the image onto Kraft paper, added a little pumpkin die cut from Mini Monsters andthen wrapped the card with some orange and black twine.
I used the Diamond background stamp again for my tag which is cut from Tags, Bags Boxes and More and added a glittered spider die cut from Doodlecharms.
Seriously, isn't that so cute!?! I love it, not to cutsey cuetsy, but not too scary or creepy either! Thank you so much Holly! Now, everybody go over to Holly's amazing blog and leave her some love in comment form!
And don't forget to check back here tomorrow for DIY Friday!!
I have a video for you all today and a Card! But my video is having trouble uploading so if its not on the blog post, Check my YOUTUBE channel and if its not there, It will be up later today!
I had a Great day enjoying my Birthday yesterday! I had a AWESOME Pizza and cake :D
But anyway, I've started working on my Christmas cards!
She has out DONE herself by using THREE yes, THREE Tanner Bell Design's stamps!! She really has showcased how it all pulls together. So I really encourage you to go over to her BLOG and tell her how much you love it!
Today we have Cameo Tuesday, instead of Cameo Monday...
Britten out DONE herself with her Cameo!
Check it out :
Here's how she done it :
This 3D Pumpkin cut is available at Silhouette Studio and is only $.75 thru Oct. 31! I used Tanner's Chevron Grunge stamp with Vintage Photo Distress ink on the Kraft pumpkin and Versamark with the same Chevron stamp on the Orange Coredinations cardstock pumpkin. The Chevron paper is from Stampin' Up! These were so much fun to make! Check out Britten's blog for more inspiration HERE Okay guys! So make sure to head over to the Cameo store and pick this one up! :D hehe. I know I will! ______________________________________________________________________________ So I did a video yesterday! Make sure to check it out and leave some feedback!
I found this really ugly Composition Notebook, So I thought why not transform it into a REALLY cool and trendy book!
Well that's what I did :
It came out AWESOME if you ask me, I LOVE it. I don't actually know what to do with it, But that's okay! I used my bestfriend, Modpodge to complete the notebook and protect the paper :D
Sunday I made this card (while watching Mean Girls)! I really wanted to try something different, and this card sketch was sort of different than I have ever made before, so I went with it!
The checkered on the bottom is from Diamond and Chevron Grunge and the "thanks!" is from It's a Baby!
the border, circles, and butterfly were all cut with my cameo!
I hope you all have a great start to your week and what could make your week better then receiving some happy mail from tanner? Order your stamps HERE!
Today is the Day, the day we have all been waiting for! Release
day! I am releasing my first ever background stamps! There are 2 sets of background stamps with a
total of 3 patterns, which are all so cool!
I have been playing with them a lot and they are so fun and
really add something to all your projects!
I have done sneak peeks with this
First set, so you might have already seen it:
Diamonds/ Chevron Grungeis two in one! Chevron is like the biggest trend right now and diamonds are just a classic! But now you don't have to own every color chevron, you can is a way wake your own!
For all the People that LOVES my VLOGS make sure to Subscribe to my New vlogging Youtube Channel! They're already two Vlogs on there! CLICK HERE TO SUBSCRIBE
Have a GREAT day!
Thanks for coming to check out the the new stamps!
Today I am going to list the Design Team and I'm SOO excited. Now, We have had some problems with are designers and two stepped down at the last minute, We will be replacing them soon :)
My name is Court. I am 14 years old and freshmen in high school. When I am not in school or doing homework, chances are you will find me in my craft room. Card making is my favorite, but I am currently trying out different things such as DIY projects, and a version of scrapbooking. My family is my greatest blessing; I love them all beyond words! When I grow up I want to adopt a daughter and be a teacher, but we will just have to wait and see! But for now, I am so super excited and honored to be a part of Tanner’s design team!
My name is Ruza and I have been crafting in one form or another since I was a very young lady. I am a stay at home mom who loves to spend her time crafting while my daughter Katie is at school or camp, or basically any chance I get to pop in my craft room. I started my Blog “Ruza’s Craft Corner” in November 2010 to share my designs with the crafting world. I am first and foremost a card maker; however, I have been known to scrapbook once in a while. I prefer clean and simple designs, but have been known to go a little crazy at times. It all depends on what I am working on.
I’m Britten and I am so excited to be a part of the Tanner Bell Design Team! I’ve been scrapbooking for almost 2 decades so I guess you can say that I LOVE making things out of pretty paper. You can find me and my creations at TwoAtATimeDesign.com – a blog named after my five-year-old twin girls. I also make guest appearances on AboveRubiesStudio.com and post way too much on facebook.com/BrittenLinn. I’m really looking forward to working with Tanner and this tremendously talented team!
Now make sure to check them out! :)
We have a big Release Coming out tomorrow! :)
I'm Really excited on sharing there projects with the stamps.
It's Friday, You know what that means! DIY Friday! I love this day because I get the opportunity to share with you a REALLY cool DIY Project, That you could try over the weekend.
Wednesday I went to this thrift store called "Begin and again" Its pretty cool, there is clothes there and random stuff people bring in. I saw this ugly white Key holder type thing for like 3 dollars
Above is what I found. I mean it was alright, But I wanted to do something fun with it!
When I got in the car I stated brainstorming what I could do with it... I first decided i was just going to paint it Blue and thats it. THEN I decided that I wanted there to be a CHALKBOARD where the cherry's were and the blue printed design.
Which created This :
Now the Black is the chalkboard! I didn't have any chalk to try it out tho, But I know it works!
Here is a video about me making it start to finish :
Here's your supply list :
-Key Holder or something like what I had to start with
-Your color paint ( I chose blue)
-Paint Brush
-Chalkboard paint
-Blue Painters tape
The first thing you should do is decide what to paint what, Example, I wanted to keep the holders white. I unscrewed them and went on by painting the wood Blue, After about three good coats I decided where I wanted the Chalboard and put the Painters tape on to a sure that no other spots would get painted. When your ready to get out the chalkboard paint I recommend three coats! I think it gives a really good feel, to! After the chalkboard paint has all three coats and there dry remove the painters tape, Hoping no paint seeped threw. If so, get the blue paint out and touch up. Lastly, Screw the white holders back in and hang it up! Now your family has a awesome Key holder or coat holder with a chalkboard to leave messages!